Image capture
General
Image capture is used to capture additional information.
Example:
Article master: Add a picture to the article number.
Goods receipt: Capture an image of the goods condition for the goods receipt check.
Several images can be captured and viewed later. Exception: Article image capture only supports one image.

A file can be selected as the data source or an image can be captured and saved using a camera. Image data that is no longer required can also be removed.
Examples
Master data - Articles:
Optionally open menu "System - Master data - Articles"
Click on article number
Open article master editor
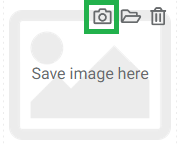
Image placeholder
Camera icon to capture an image via camera.
Folder icon to capture an image from a file.
Optional: Click on image placeholder directly (display only)
The article image capture only supports one image.
Goods receipt - Manual receipt:
Start the manual receipt via the delivery note.
Maintain the "Loading unit" item in the manual receipt window. This makes the camera symbol visible.
Image placeholder
Camera icon to capture an image via camera.
Folder icon to capture an image from a file.
Optional: Click directly on the image placeholder and use the camera / folder icon to capture the image.
Manual capture Camera available:

Image capture activated by selecting Camera / Folder / Delete:

Storage overview - SU details:
Open the editor in the SU details for the storage unit.
Image placeholder
Camera icon to capture an image via camera.
Folder icon to capture an image from a file.
Optional: Click directly on the image placeholder and press the plus symbol. Then use the camera / folder icon to capture the image.
Other functions:
As a rule, an image can be stored where there is an image placeholder.
To do this, the editor must be opened at the function.
The image capture can then be started via the image placeholder.
Multiple image capture and display favourite
If the image capture function can capture multiple images, it should also be possible to select a display favourite.
To do this, activate the editor for the function.
Click on the image placeholder and select the desired image using the side arrows. Then click on the star symbol.
Note: The current display favourite does not show the star symbol!
Capture the image and exit the editor by clicking Save.
Delete / change image
The image is saved in JPG format.
The width is compressed to 1000px if it is larger.
Data retention with project data volume
Image data is retained in COGLAS even if the associated object has already been finalised or booked out. The project data volume increases accordingly for data retention.
→ back to COGLAS processes
→ back to COGLAS menu
