Warehouse overview
General
The warehouse overview shows the interactive graphical representation of the topology in the upper part of the screen.
In the lower area, tabs can be selected to display different information. Different function calls are possible depending on the tab.
COGLAS offers you the option of managing various storage types in your warehouse. Management is accurate to the millimetre for all storage types except for block storage. Creation can be carried out both via the graphical user interface (see Changing topology) and via Excel (see Import/Export).
The extended search function can also be used in the warehouse overview. Saved filters can optionally be used by all users.
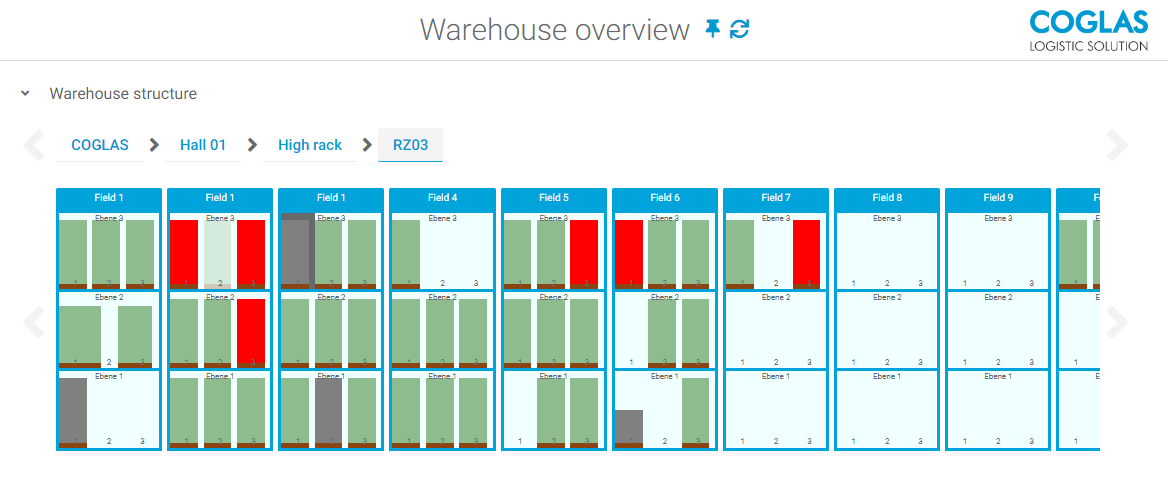
High racks and shelves
High racks and shelves are displayed in fields, levels and positions. Each position can have its own barcode. One storage unit can be stored per position.
The display is frontal on the shelf without depth information. Storage units are shown to scale.
Color | Description |
|---|---|
Green | Available stock |
Light green | Available stock (storage unit is not yet in target location) |
Blue | Fairground |
Grey | Inventory / storage location block |
Red | Whole storage unit not available |
Light red | Entire storage unit not available (storage unit is not yet in target location) |
Block
Block stores have a unique barcode and a defined maximum capacity.
The capacity indicates how many storage units can be stored in this block. In this example, there are 53 storage units on the block buffer area of maximum 10,000 units.

Tray
Trays are located in shuttles, lifts or paternosters. The illustration is the top view of the tray without height information. You can store the dimensions to the millimeter in width and length. Storage units are placed on the tray and are displayed to scale.
In this example, there are two Storage Units on Tray 01, of Lift 01. The blue storage unit is defined as a fixed location.

Continuous flow channel
The representation of flow channels is shown in cross-section. On the left is the extraction.
Navigation buttons
Tab: Storage units
Representation of storage units incl. Content and quantity. Bookings and data maintenance are possible via buttons and links.
Button | Description |
|---|---|
Transfer storage units | Allows unplanned stock transfers to the subsequently selected target area after selecting one or more storage units. |
Transfer stock | Relocate stock Allows unplanned stock transfers of all selected stock to any target storage unit after selecting one or more storage units. |
Create storage unit | Manual creation of stocks, for example when a storage unit is found. |
Print selected SSCC labels | Reprint of the SSCC labels from all selected storage units. |
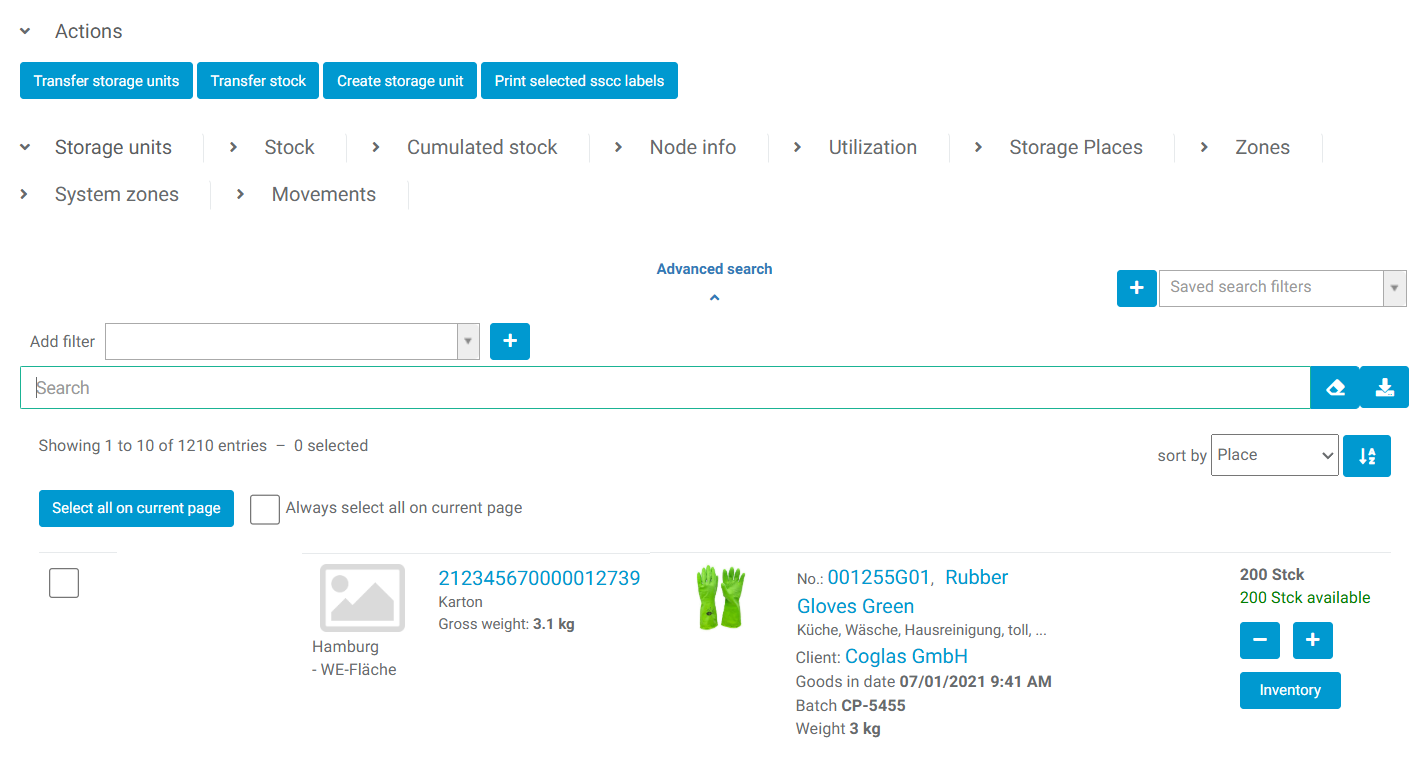
By clicking the download button next to the full-text search, the currently displayed storage units can be exported as an Excel report. Only those SUs that match the current filter settings will be exported. A maximum of 20,000 entries can be exported.
Tab: Stock
Cumulative stock per article number on the selected node.
Button | Description |
|---|---|
Transfer stock | Relocate stock Allows unplanned stock transfers of all selected stock to any target storage unit after selecting one or more storage units. |
Tab: Node info
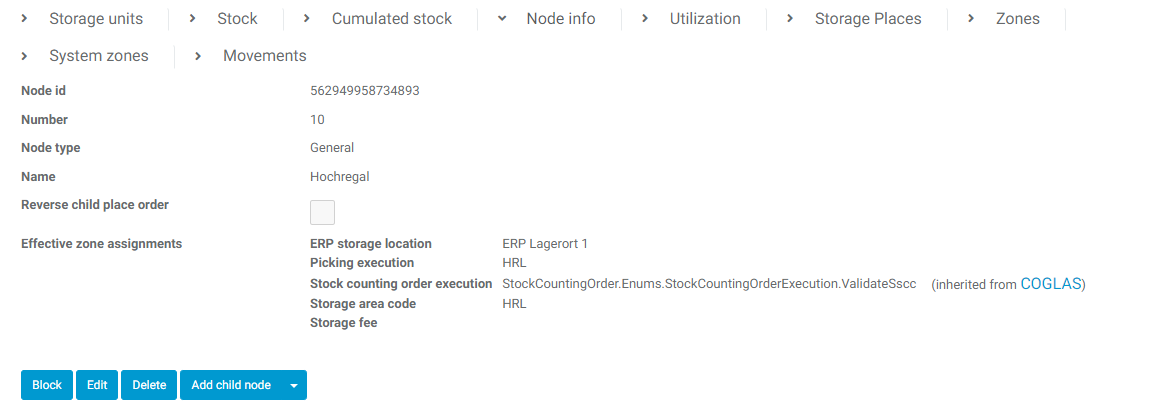
Information about the selected node. Name and number can be changed, subnodes can be created or the selected node can be deleted completely.
Button | Beschreibung |
|---|---|
Edit | The display name, number and barcode can be changed. The number specifies the order of the nodes of a layer on the screen, it must be clear in the layer. |
Delete | Nodes with inventory or subnodes cannot be deleted. |
Add child note | If a node without its own storage locations is selected, the storage structure can be extended. The following node types are available for this purpose:
More information can be found under the button “Change topology” at the top of this page and in the chapter Interfaces › Import / Export. |
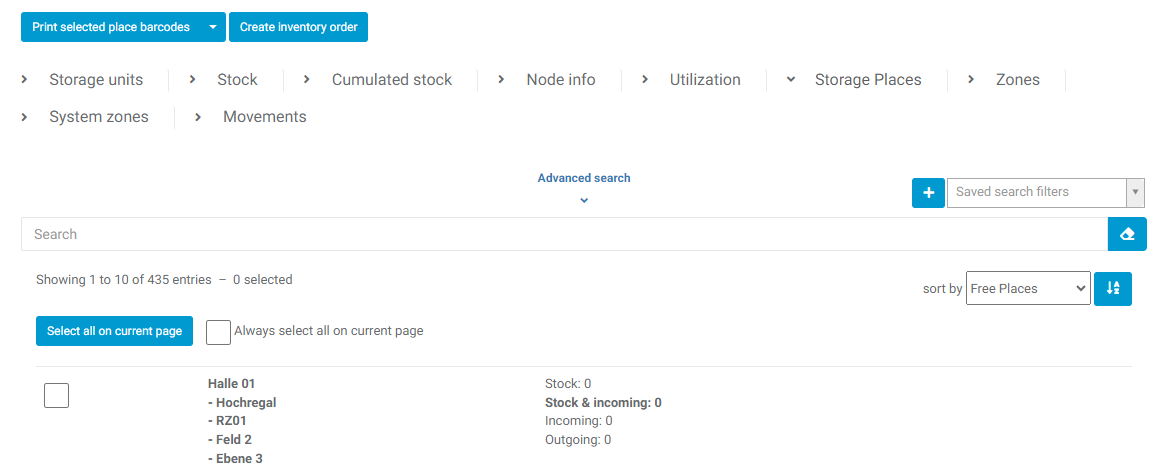
Tab: Storage places
Display of coordinate, barcode and capacity as well as the stock overview with incoming and outgoing quantities per article number. The printing of labels for marking the storage locations can be done here.
Button | Beschreibung |
|---|---|
Print selected place barcodes | For the storage locations selected in the list, location barcodes can be generated to mark the warehouse. The barcode assigned to the storage bin is used here. This can be adjusted at any time directly in the node info or by means of import/export of the warehouse topology. Using the small arrow on the right edge of the button, the alternative option for printing the storage location labels in 2D format appears: Print selected storage location codes (2D). |
Tab: Zones
Display of the zones directly assigned to the selected node / storage location and inherited from higher-level nodes. Changes to the zone allocation are possible here.

Zone type | Value (example) | Description |
|---|---|---|
ABC classification | A | Goods allocation by ABC value from article master. Overflow in case of lack free storage space |
Execution picking | Pick-Zone 1 | Division of storage locations into picking zones for order picking |
Crash class | 3 | Goods allocation by ABC value from article master. Overflow in case of lack free storage space |
ERP Storage location | 0100 | Physical separation of inventories within the ERP system. As soon as the storage location of a stock changes between two zones, a feedback of the type “StockTransformation” is initiated. |
Hazardous substance storage | GS 1 – Paint and varnish | Zoning of dangerous goods on the basis of the defined GS zones |
Hazardous material envelope | No value | Intermediate destinations without hazardous substance restrictions for handling the goods (e.g. goods receipt / provision) |
Load area | Gate 1 | Destination zones for the loading of goods in the course of goods outwards |
Loading area proposal | Gate 1 | Automatic determination of a loading location based on the current locations of all loading units for the respective goods out tour |
Loading equipment | EURO | Restriction of permissible loading equipment types in the target area. Only deposited types may be stored via system transfer order. Without limitation, all types are valid. (Unplanned stock transfers without restriction) |
Storage area code | First floor | Individual zones for material flow control with the help of strategies |
Stock money (maximum value) | No value | If zone used: only places within the zone are taken into account to determine the storage fee. |
Production line | Line 1 | Definition of productions to control the movement of goods (production supply / transfer of finished goods to the warehouse) |
Transport routing | Thrustmaster | Division of transfer orders into freely definable zones, cf. pick zones for transfer order processing. The transports are assigned to the respective menu using the Transport routing configuration. |
→ back to COGLAS processes
→ back to COGLAS menu
