Picking
General
Two main categories are available for order picking:
Order (single-order picking)
Multi-pick (multi-order picking)
After selecting a category, the picking round can be started either in a specific picking zone or in the entire warehouse.
The order of the pick items is determined in the system based on the following criteria:
Optional individual sorting:
This can be set up using the ‘Change topology’ function in the Warehouse structure chapter.Node path Source storage bin
Order item ID
The setup of picking zones is explained in detail in the chapter Warehouse structure → Strategies.

Setting up Multi-Pick
Before starting a multi-pick round, the desired pick trolleys must be set up, i.e. the corresponding picking storage units must be assigned:
An empty pick trolley is scanned.
The picking storage units suggested by the system must be confirmed in the spaces shown on the trolley.
Once the last picking storage units has been confirmed, either another trolley can be set up or the tour can be started.
The waiting pick items - sorted by order priority, planned goods issue date and creation date - are taken into account when creating the round trips.
The system assigns picking storage unit types to a pick trolley, taking article and order properties into account, in order to be able to accommodate as many containers as possible on the trolley.
A fixed number range can be used to identify the picking storage units. Alternatively, an ID is generated by the system.
Further information on defining pick trolleys can be found in the chapter Warehouse structure ‘ Change topology.

Picking execution
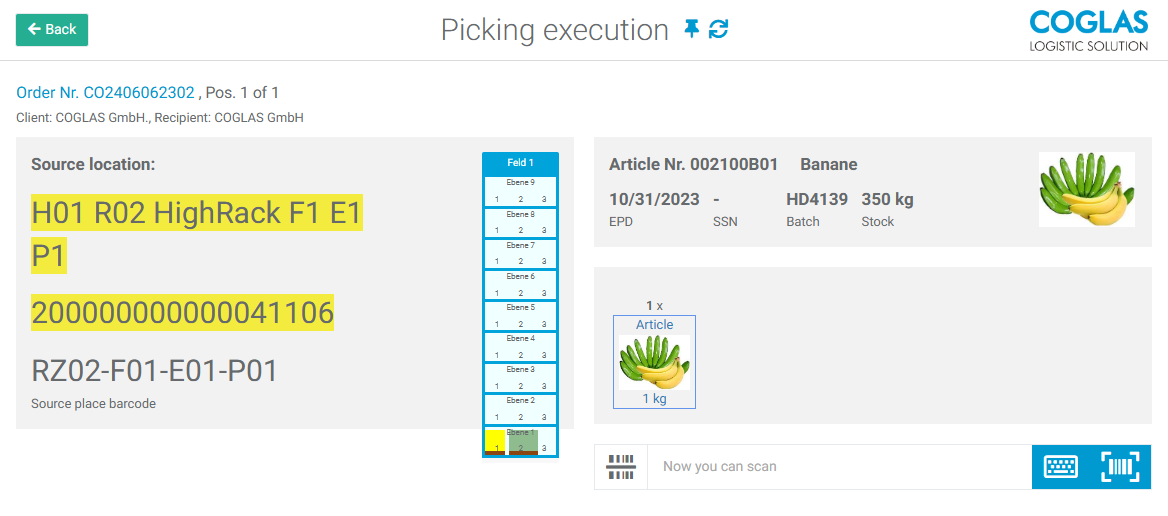
In the first process step, the user is shown the storage bin to be approached and the information required for picking. The packaging levels maintained in the article master are also displayed. You can find more information on the packaging levels of articles in the chapter Master data → Articles.
Withdrawal of the required quantity:
The removal can be carried out using the button (white arrow on blue background) or by scanning one of the following pieces of information:
Barcode of the source storage location
Barcode of the source storage unit
Barcode of the article number of the requested article
Partial quantity confirmation by clicking or scanning is available as an option. The user confirms each picked partial quantity by scanning the article number / GTIN or by clicking on the respective image of the packaging level.

Random access for block picking:
If the pick is made from a block, random access is used. The employee can scan any storage unit in the labelled block as a source, provided the stock qualifications match. This process is similar to random access in the Transport → General.
System function ‘Skip pick position’:
Individual pick positions can be moved to the end of the current processing operation using this function. This can be useful if, for example, an aisle in the shelf area is blocked by another colleague.
Customisation of the run routine:
The run routine can be customised during the picking process. To do this, the picker clicks on ‘System’ in the dialogue and selects ‘Routine’. For example, the sequence can be changed from ascending to descending storage location.
Posting to picking storage units
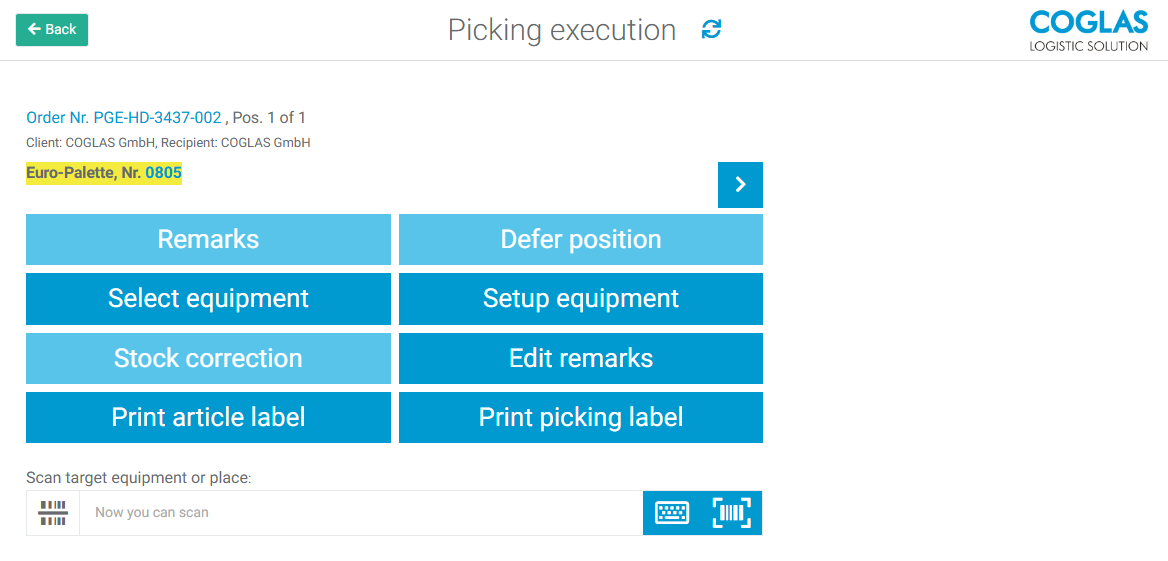
In the second step, after confirming the quantity, the picked goods must be placed in a picking storage unit:
The system proposes a suitable type and a four-digit ID number to identify the picking storage units.
The user can overrule this suggestion by setting up a different type or by selecting a different number.
Completing the pick:
To finalise the pick and continue with the next item, the white arrow on a blue background must be pressed again. Only after this step is the stock transferred to the picking storage units.
Complete the tour:
At the end of the tour, all the picking storage units used are automatically posted to the staging area. The picking storage units can then be consolidated, packed and prepared for dispatch. Further information on the packaging process can be found in the chapter Goods out → Packaging. Alternatively, the tour can be started, see Goods out → Tours.

Zero-crossing inventory:
If a storage bin becomes empty due to the removal of the pick quantity, the employee must confirm this status or post any remaining stock as a correction quantity. This inventory procedure can be activated in the programme.
Options
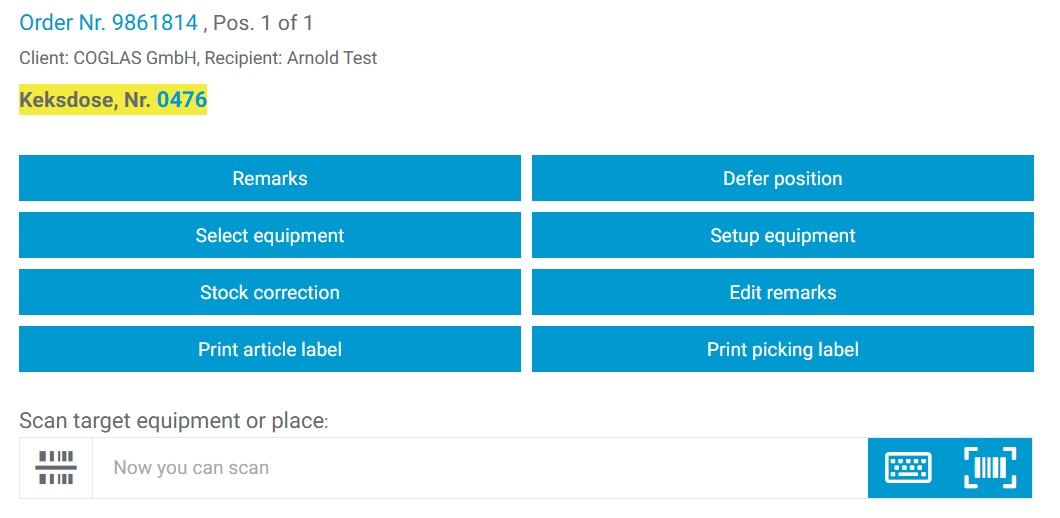
In the second step of order picking described above, there are various options, which are briefly described below:

Option | Description |
|---|---|
 | Remarks on the picking position can be displayed. |
 | The picking position can be deferred and called up again later. The button is only available if quantity “0” was picked in the previous step. |
 | Open a selection window to choose a equipment. The equipment suggested by COGLAS is highlighted in yellow above the options and can be confirmed by clicking on the blue box with the white arrow. Alternatively, the equipment can be scanned directly. |
 | Setup of a new equipment for picking. |
 | If quantity “0” has been picked because the space is empty, this button can be used to report it as empty. The Storage Unit is transferred to the inspection area. |
 | Remarks on the picking position can be created or edited here. |
 | Printing an article label. The label can be customized using report templates. Click on the button to specify the number of copies. |
 | Printing of a picking label, which can be customized using report templates. |
Picking storage unit disassembly
Picking ends when the finished picking storage units are dismantled for staging. Various teardown modes can be set to adapt the process to operational requirements.
Settings for ‘Picking: Set-up mode’:
Automatic teardown (default):
At the end of picking, the picking storage unit is automatically disassembled and posted to the system zone ‘Disassembly provision Goods out’. The sales order receives the status ‘Ready for loading’ as soon as all picking storage units have been dismantled.
Staggered order start (transport picking storage units):
Disassembly is automatically coordinated according to stored rules, which are described in the transport rules menu for staggered order start.
Manual dismantling:
Manual teardown enables the finished picking storage units to be made available at the end of the tour. Any picking storage unit can be scanned and all associated picking storage units are displayed with their location and planned destination.
Not required:
The picking storage unit is not automatically dismantled and the process must be carried out manually. The picking storage unit is created in the warehouse for the ‘Picking area’ system zone and can be cancelled manually.
FAQ
Situation | Cause | Solution | |
|---|---|---|---|
| 1 | Mixed order picking MultiPick Mixed picking does not work for manual set-up. It is not possible to pick 2 orders in one box. | #1 Orders with different clients. #2 Orders with different recipients. | Only orders with identical clients and recipients can be picked together into a picking storage unit. |
| 2 | Picks from different zones are not displayed in individual zones | Picking: Single user picking | Either deactivate the storage option or complete the order in the other zone. (Caution: manual dismantling can take longer) |
| 3 | Manual set-up does not find any orders, with automatic set-up the orders are set up. | During manual set-up, only orders that do not yet have a picking list ID are displayed, i.e. orders that have not yet been processed by another employee. |
|
| 4 | Customer order was set up on a transport trolley. How can the set-up for an order be cancelled? | It is not possible to take back or cancel the customer order for armour on a transport trolley. | Alternative:
|
→ back to COGLAS processes
→ back to COGLAS menu
