General
The transport dialogue shows the user how the transport order for the goods is executed from the source to the destination. In addition to the configurable standard process activities, there are of course also exceptions that the user can select.
Basic structure
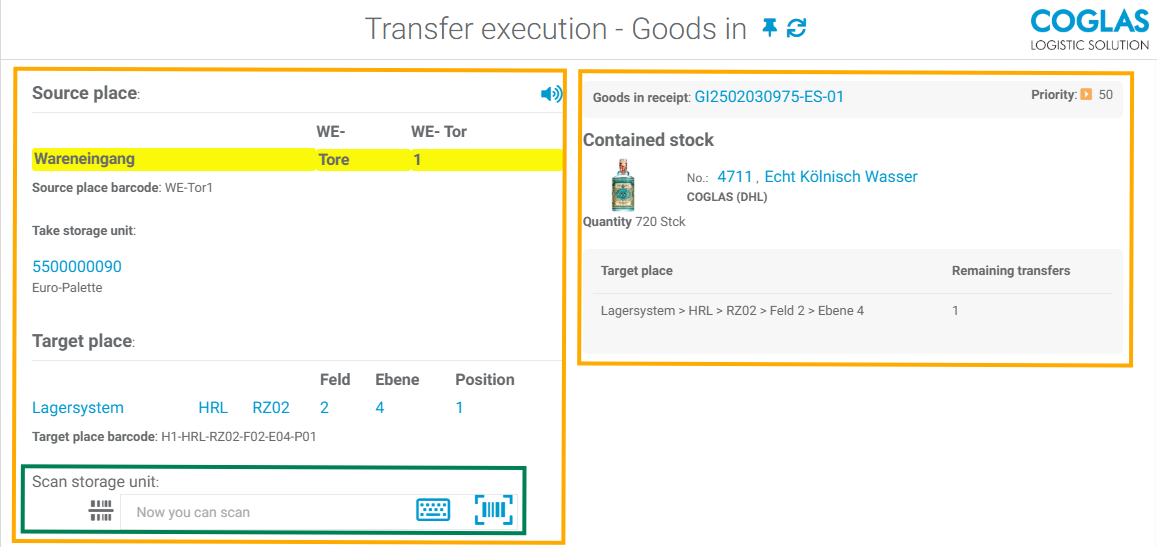
The transport dialogue shows the user the process steps, including additional information.
In addition to the source storage location where the goods to be picked up are ready for transport, information such as LE, destination storage location and matching barcodes are displayed.
On the right-hand side, there is further information about the transported item, quantity and any other transports for the selected order.
In addition, value-added services ![]()
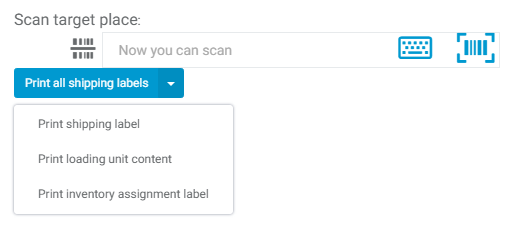
When transporting a provision, various reports can also be printed after source validation. These can be customised under the report templates.
Goods Receipt - Free acces of handling unit
Starting with version 2.146, you can freely select the handling unit (HU) to be transported in the goods receipt process, provided it belongs to the same goods in receipt. In this case, you can scan a different handling unit in the transfer of a goods receipt process than the one displayed, and the transport will switch directly to the scanned handling unit.
Source validation
During source validation, the user is prompted to identify the storage unit by scanning the NVE/SSCC number to ensure that the correct goods are placed in the transport provided.
This entry can be made either by scanning or by manual input.
If zero-crossing inventory is enabled, a security query is made for accounting control when removing goods from a storage location (in the available stock zone).

If the answer is NO, an inventory order is automatically generated to recount the storage location.
Please note: Source validation is not required if an NVE/SSCC is scanned directly from the transport dialogue.
Target validation
In the second step, the goods are transported to the destination storage location. After scanning and source validation, the view changes and an image of the storage topology is displayed, showing where the goods are to be stored.
Here, the user is prompted to validate the destination storage location. This is usually done by scanning or entering the storage barcode.
It is also possible to confirm the destination validation by simply pressing OK.

After scanning (or confirming with OK), the goods are placed in the destination storage location and the transport order is completed.
Exceptions
Depending on the progress of the process, exceptions may occur during processing in the above-mentioned process. These are context-sensitive and can be accessed by the user in the system menu in order to offer a process for the exception situation that has occurred.
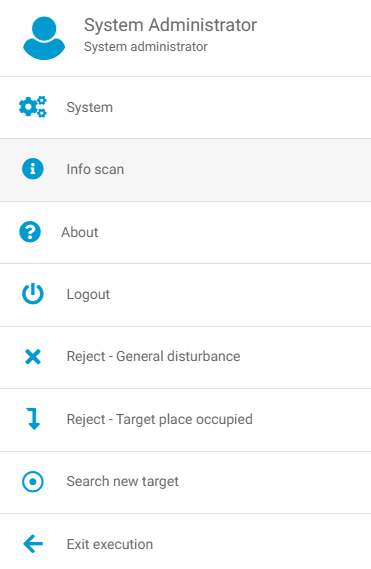

Reject - General disturbance
If the user selects this option, the transfer order for this LE is posted with the status Reject.
This LE must be processed manually in the transport control centre.
Reject - Storage unit not at source location
If the user cannot pick up the specified SU for transport to the destination storage location because, for example, it cannot be found or reached there, he selects this entry.
The storage unit is posted to the inventory clarification area, and an entry is made in the stock movements and also in the transport control centre.
The SU must be processed manually by the control centre.
GTIN cannot be scanned
If the GTIN cannot be scanned (must be activated via the warehouse option), the user can confirm this here; they can now also perform source validation via LE or warehouse location.
If there is more than one transport order for the selected goods receipt delivery note, the user is given the following two options
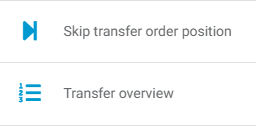
Skip transfer order position
The current source is skipped, and the next position of the selected goods receipt delivery note is offered.
Transfer overview
All outstanding transport orders for the selected goods receipt delivery note are displayed.
Exit execution
If the transport order cannot or should not be processed (further), it must be exited using this function.
Reject - Target place occupied
If transport to the destination storage location cannot be carried out, the user can cancel the storage dialogue for the current LE via this exception. The control station must then create a new transport for this LE.
Alternatively, the user can also use → Search for new destination.
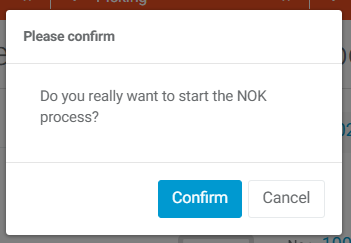
NOK - Not OK
In various cases, transports must be interrupted during removal from storage if there are regulations that prevent the goods from being transported, especially if they are defective/damaged or otherwise not in order.
The NOK process can be used to interrupt this transport to the destination storage location and select a new storage unit with the same quality characteristics.
The user is asked in advance whether they want to start this exception process.
If so, the picked LE is posted to the area specified under the Clarification Inventory zone. The forklift driver then places the LE in this area (the LE is processed in further processes) and is shown a new source with an LE.
If such a source unit no longer exists, he receives an error message.
The control station must then administer this order manually.
Search new target
In some cases, the user must select a new target storage location (e.g. because the aisle in which they want to store the goods is blocked or the storage location is occupied). To do this, they can open a new dialogue box via the Find new target process step:
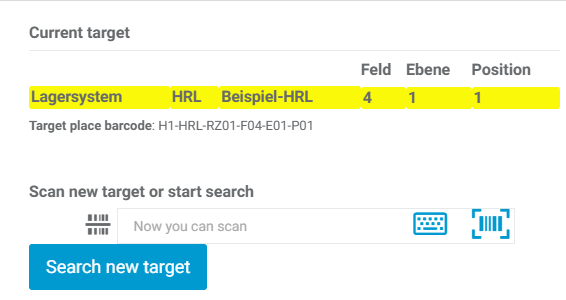
There are now two possibilities here:
-
The user searches for a new destination. COGLAS determines a new, suitable destination and the destination validation dialogue is reopened.
-
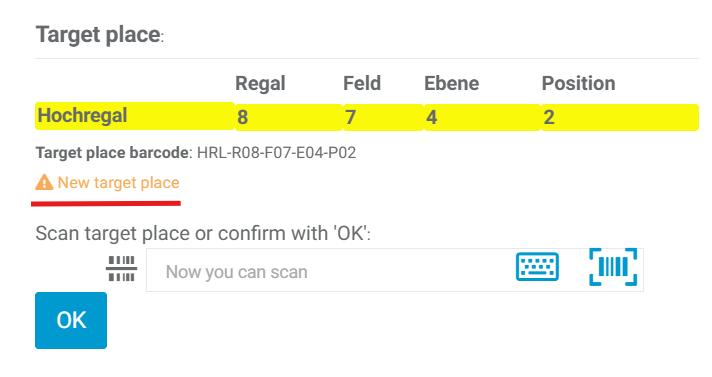
or the user scans a new, free destination. The system checks whether the LE can be parked there.
In both cases, the target area is checked against the selected strategy to ensure that it has the same target settings, so that items are not placed in an area that is not suitable based on the previous selection (e.g. weight restrictions, ‘cooling area’, not permitted for INDU pallets, etc.).
From version 2.140 onwards, it is also possible to scan another location that corresponds to the same target settings directly via the transport dialogue instead of the specified target storage location. The new location must then be scanned again for confirmation. A warning message is also displayed to indicate that this is a new target storage location.
→ back to COGLAS processes
→ back to COGLAS menu